
Integration Options
Two paths to accept crypto payments.
Choose your path
Pick one — you can combine them laterGenerate bills, charge customers, and let CoinPayments host the entire checkout experience.
- No payment UI to build
- Dashboard, API, or Buy-Now button
- Auto-settles to your preferred currency
Mint per-customer deposit addresses and design the flow of funds yourself.
- Permanent or temporary addresses
- Attribute deposits to your customers
- Granular control over fees and consolidation
Invoices
Generate an invoice, hand the buyer a link, and we'll host the entire payment experience — currency selection, confirmations, refunds, and webhooks. Issue from the dashboard with no code, or drive it programmatically via the Invoices API.
- Need to bill their customers for single purchases (i.e. products)
- Need to bill their customers for recurring services involving subscriptions
- Require an easily accessible financial history via the invoice documents
- Prefer the simplicity of CoinPayments-managed invoicing, delivery, and payment collection
Invoice via Dashboard
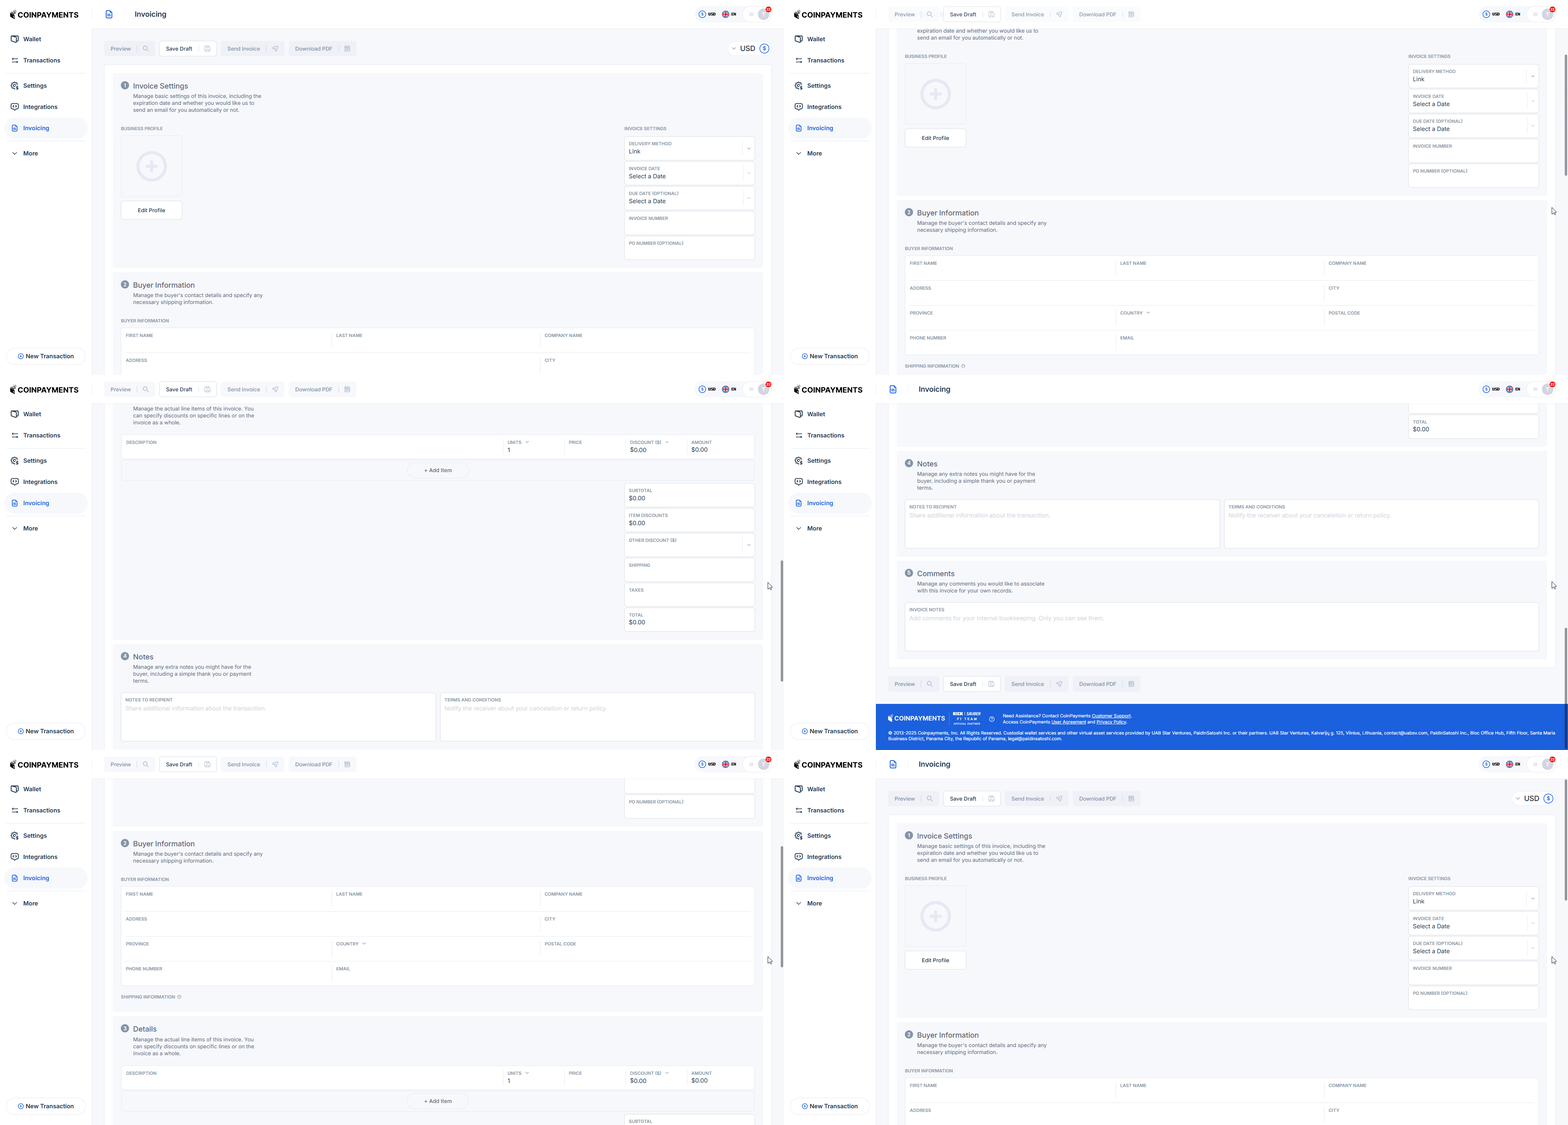
Delivery method, delivery date, due date, invoice and PO numbers, business branding.
Customer personal and business details, location, contact, and shipping (if applicable).
Product name, quantity, price, applicable discounts, shipping fees, and taxes.
A note to the recipient and your terms & conditions.
Notes for your records — never shown to the buyer.
- Link — Share the invoice URL with the recipient manually.
- Email — Auto-delivered to the recipient on the date you specified.
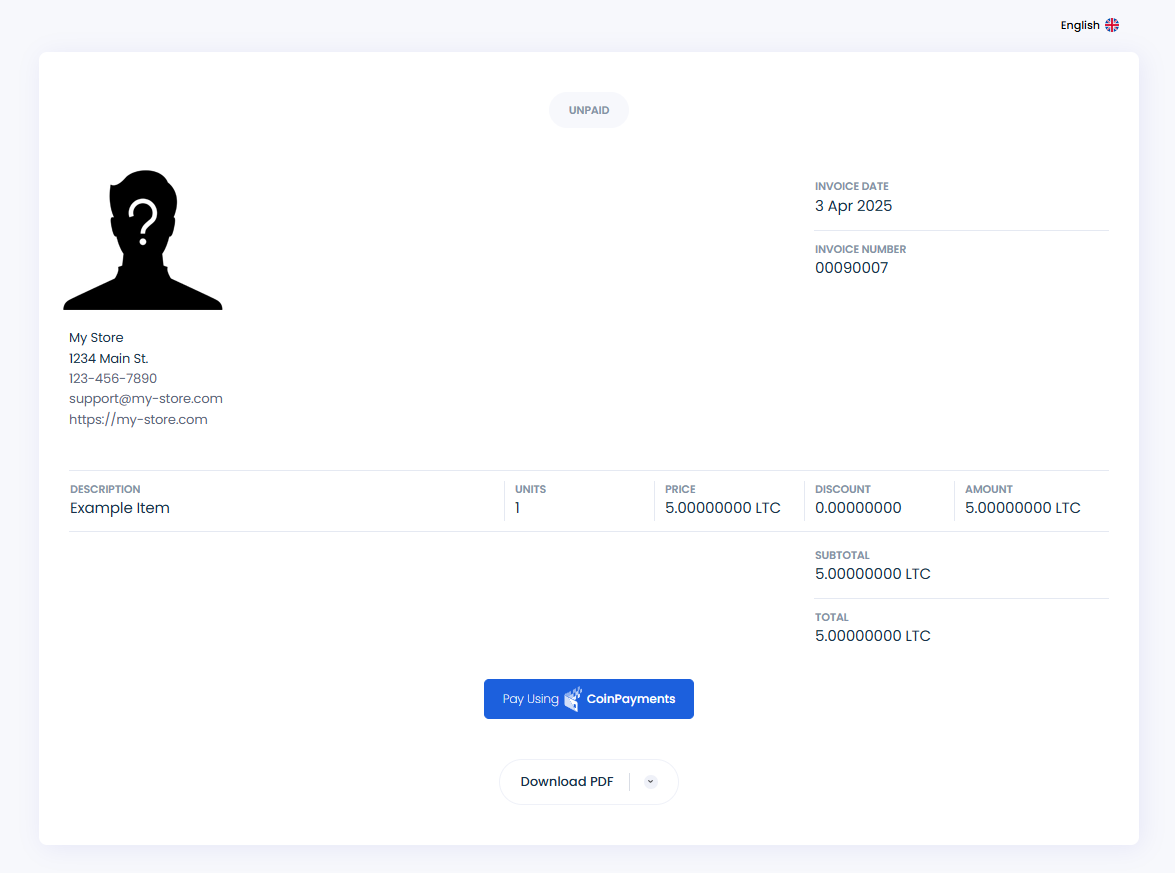
Customers land on the hosted invoice page, then click Pay using CoinPayments to launch the payment window.
What the buyer sees when they open the invoice link.
How the buyer pays once they click Pay using CoinPayments.
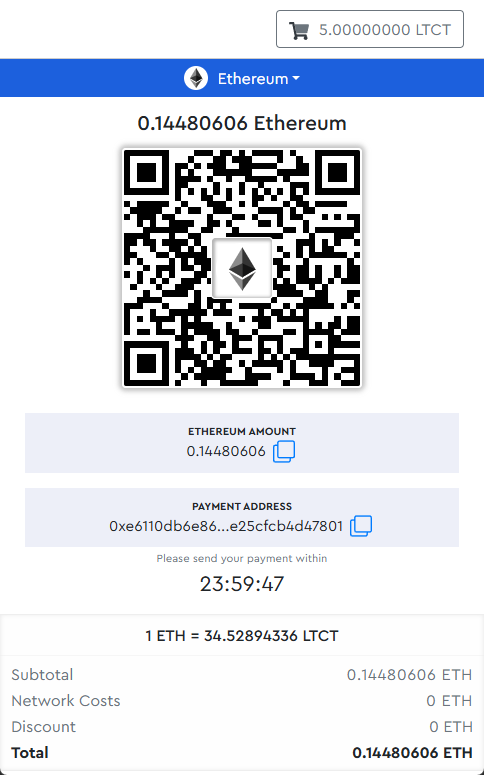
Payment timeout & fees
Read more on the payment timeout window and associated fees.
Invoice via API
After creating an invoice via POST /merchant/invoices, the response carries two URLs — one to share, one to embed:
Send this URL to your client. It renders the hosted invoice with a “Pay using CoinPayments” button that kicks off the checkout flow.
Drop this URL into your own UI to display the checkout/payment window directly to your client.
Invoice distribution
Compare the integration shapes: Invoice Link, White-Label Checkout, and Displaying Invoices.
Invoice notifications
React to invoice events with webhook notifications, or poll GET Invoice Status.
Invoice via "Buy Now" Button
Click the button above to preview the express-checkout flow.
Generate "Buy Now" buttons
Step-by-step setup is in the Buy Now button example.
Automatic Transfers
Wallets & Addresses
Drive the collection flow yourself via the wallets API. Create a wallet per currency, mint per-customer addresses, and react to deposits with webhooks — perfect when you need a permanent, on-demand way to receive funds.
- Need a permanent, on-demand way for customers to deposit funds
- Require a permanent or temporary window for customers to deposit an arbitrary amount of funds
- Would like to customize their integration to fit their company's unique requirements
- Would like to optimize fees associated with currency collection, both on a micro and macro scale
Payment Architecture
Wallets host either permanent or temporary addresses. Your choice shapes the flow of funds and the fee profile of the integration.
The common pattern: one address per customer, stored against your internal customer id. Every incoming deposit then maps back to the right account.
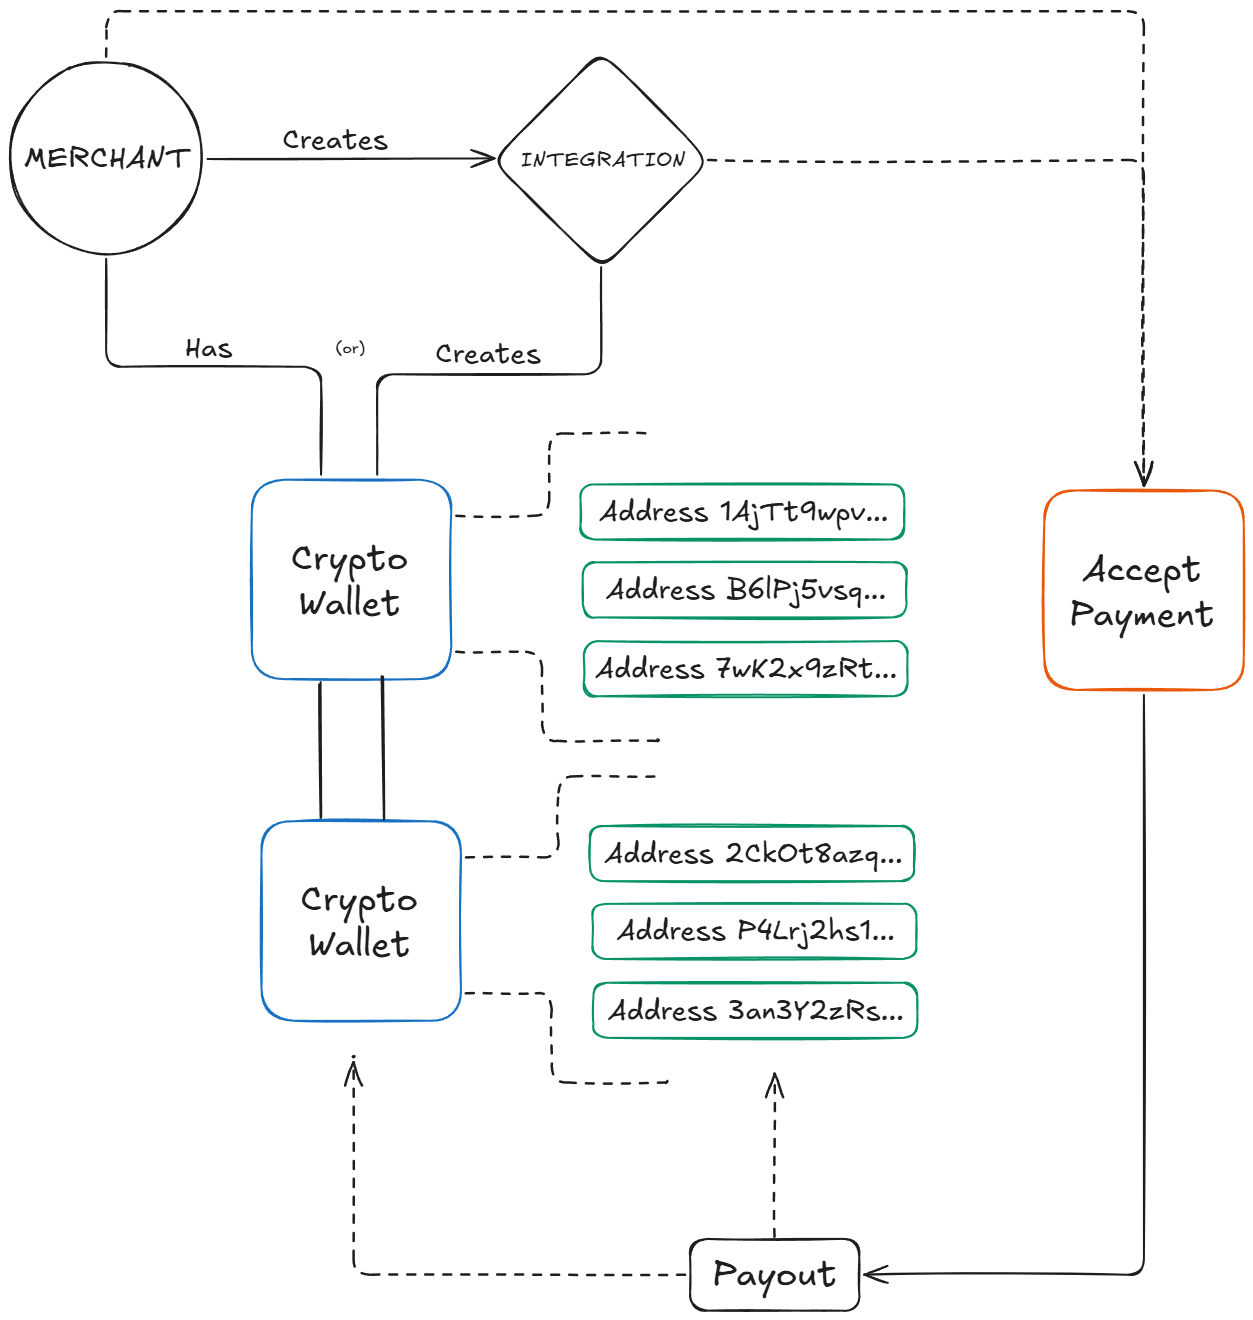
Collecting Payments
To collect a payment, display the address's networkAddress to the customer. Your platform then controls:
- How to render the collection window or address
- What amount counts as a completed payment
- How to fulfil the customer once they pay
QR code address display
See the QR code example for rendering a network address as a scannable QR.
Deposit notifications
React to incoming deposits with webhooks, or poll GET Transactions.
Withdrawing Funds
Temporary addresses
When collecting via temporary addresses, funds aggregate into a wallet-level virtual balance — withdraw straight from that balance.
Permanent addresses
Permanent-address wallets distribute funds across many on-chain addresses, so a direct withdrawal can incur extra fees to gather them. Two options:
- Pre-consolidate into a temporary wallet first via sweeping & consolidation, then spend from that wallet.
- Or accept the extra fees and process spend requests sequentially — one at a time, because the auto-consolidation step rejects concurrent attempts.
Full detail in Address Types.
Sweeping & Consolidation
Consolidated funds can land in other internal wallets, external addresses, or be auto-converted into a target currency on the way out.
- For granular control, call the consolidation routes directly and pick the exact source/destination addresses.
- For zero-code automation, set "trigger amounts" on the dashboard to fire transfers on a balance threshold — optionally converting into a strategic holding currency at the same time.
Ready to integrate?
Pick the next step that matches your stage.